Search This Blog

Showing posts with label bountiful baskets. Show all posts

Monday, June 13, 2011

Summer Vacation!

a victorious tomato and red chili
I have been a very neglectful blogger, but now it's summer vacation. There aren't a whole lot of good excuses to not take an hour or two a week to write down what I cooked during summer vacation. The most exciting thing about summer so far is that my little urban victory garden hasn't been a total bust. The herbs are flourishing, and look what I picked on Sunday!

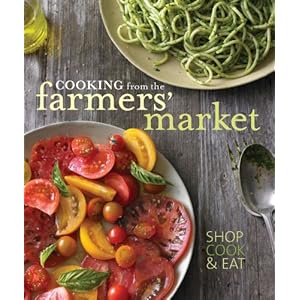
We've been getting lots of that early summer sweet corn that's so abundant this time of year in our bountiful basket lately, and I had a few week old ears to get rid of, so I turned to my go-to produce cookbook. It's called Cooking from the Farmer's Market, and I absolutely love it because it has great, simple recipes organized by different fruit and vegetable family such as "beans & peas," "cabbages & other crucifers," or "stone fruits." The sweet corn section had recipes for Chili-Rubbed Corn on the Cob, Corn Pudding with Chives, and Risotto with Fresh Corn and Basil Oil. The Corn Pudding is next on my list, but since my basil plant is going so crazy it's starting to flower, I opted for the recipe that used it.

fresh basil from my little garden
This is only the second time I've made risotto. I was terrified I would mess it up like I did paella, but it's really simple. The first time I ever tried, I was totally blown away by the fact that there is no dairy in risotto. "How on earth is it so wonderfully creamy?" I wondered. It turns out that the procedure of slowly adding hot cooking liquid and constantly stirring (which I will explain below) loosens the starch molecules from the grains of rice into the surrounding liquid. Yum!

Extra fancy like me!
A word about rice: long grain rice won't work. Most recipes recommend a high-starch, low-amylose (fancy word for a type of glucose found in starches) short grain rice such as arborio or carnoroli. These pedigrees of rice are typically imported and extremely expensive in a normal grocery store (I found them for more reasonable prices at World Market). The problem with using any old rice for risotto is not any old rice has properties needed to absorb liquid while releasing starches. We had calrose rice at home and figured since it makes great sticky rice, it would work for risotto, and it did. You might have better results with the fancy rice, but I am not going to pay $10 for a box of it.

Risotto with Fresh Corn and Basil Oil
  • 2-3 ears of corn, husks and silk removed
  • 2 Tbsp butter
  • 1 cup thinly sliced leeks (use only the white and pale green stalk)
  • 2 cups chicken broth
  • 1 1/2 cups short grain rice
  • 2 Tbsp snipped fresh chives
  • Salt and freshly ground pepper
  • 4 Tbsp Basil Oil (recipe below)
  • Strip the kernels from the ears of corn. There are tools for this, but why buy one when you already have a knife? If you're worried about kernels flying all over the place, hold the corn in a large mixing bowl as you slice the kernels from the ear. 
  • Melt the butter over medium heat in a large skillet. Add the leeks and stir to coat. Cook the leeks on low heat until soft, about 5 minutes.
Step 2
Step 1


  • Pour the broth and 3 cups water into a saucepan and place over low to medium heat. Adjust the heat as needed to keep the broth hot, but never simmering.
  • Raise the heat under the leeks to medium, and add the rice. Stir the rice and leeks and cook the two until the rice is translucent, but not browned (about 3 minutes).
  • The set up: hot liquid needs to be added to the rice 1 ladle at a time.
  • Begin adding the hot liquid 1/2 cup (I just use a ladle) at a time, stirring constantly and adding more liquid only when the previous ladle-full has been absorbed. This is the hardest part (for me) of making risotto. I tend to be a multi-tasking cook; I like to do other things like fold laundry, play a video game, or make the world's stupidest tumblr during cooking steps. If you want creamy delicious risotto, however, you've got to stand there and stir.
  • After about 10 minutes, stir in the corn and continue adding the broth in small increments. It should take about 20 minutes for the rice to absorb all the liquid and become al dente and creamy. If you need more liquid, use hot water.
corny
  • Remove from the heat and stir in the chives and 2 Tbsp of the basil oil. Divide among bowls and top with remaining oil. Serve right away.


 Basil Oil
  • 1/2 cup fresh basil leaves (this is about a handful)
  • 1/2 cup extra virgin olive oil
Combine the basil leaves and olive oil in a blender. Seriously. That's it.


The dish turned out great. It's very summery and mild and would go well with anything off the grill. We ate it with leftover steak and beets. Later this week I'm going to try making my own poppy seed dressing for a spinach and apple salad and some very adventurous burgers.

Wednesday, April 13, 2011

What the %()&$#! is that: Chayote Edition


These little guys were in my produce basket this week. I was glad I arrived before the produce truck and helped distribute on Saturday because I got to see the boxes they came in and write down the name. They are most commonly called chayotes, but there are some regional names for them that are too good not to post. In les pays francophone, one might call them christophenes. Throughout Central America, a chayote is a choko. In Brazil, it's a chuchu, and in India it's a chow chow. If you happen to live in the swamps of Louisiana, you will recognize this vegetable as an alligator pear.

An urban legend circulates Australia claiming that the McDonald's restaurants there use chayote rather than apples in their apple pies because they maintain attractive color and firmness when cooked. I told my husband. He said he doesn't care what's in a McDonald's apple pie because they are delicious no matter what.

The other vaguely interesting factoid I found researching the alligator pear (see, it is the best name), is that many people report allergic reactions after contact with the squash's skin. I didn't notice any reactions at the distribution because each chayote was individually wrapped in small plastic baggies, but when I started to peel the chayotes to cook them, my hands and arms went all itchy and blotchy. Fortunately, the flesh of the squash does not cause the same problems.

Since Julia Child didn't include any christophene recipes in MtAoFC, and I couldn't find any recipes for chayotes in any of my other cookbooks, I turned to the internet for recipe ideas. Unsurprisingly, most of what I found was for Mexican or Central American style cuisine. This worked out well. The produce co-op planners are prudent, so I also had several Anaheim peppers on hand. I searched, compiled and tweaked and came up with a few promising ideas.  Pack my knives and call me Kenny 'cause I'm about to make chayote two ways.
 
Tuesday's Dish - Rice with Chayote

I'm told this dish is called a Fritanga and is a staple in Guatemala, but searches for the word just yield Nicaraguan restaurants, so I'm not sure I believe it. It's basically a saute of chayote, tomatoes and onions with cooked rice and seasoning. I realized too late that I might have had better results if I had used uncooked rice and made it as a paella. My aunt gave me a beautiful paella pan for my birthday in March, but so far I have only used it as a roasting pan for chicken. It's exactly the right size.

the cutest tomatoes
  1. Peel, slice and sautee 1 chayote along with 1 medium onion (diced) and 2-3 chopped garlic cloves.
  2. Add about 1/3 cup cooking liquid (I used chicken stock, but vegetable stock or water would work just fine I'm sure) and chili powder, cumin, paprika and a pinch of cayenne pepper.
  3. Stir in 2 cups of cooked rice and a coarsely chopped tomato. Cook until heated through.


Chayote stays firm through cooking and has a mild taste similar to cucumbers. They're family, after all. The real star of this dish was the cherry tomatoes I quartered and sauteed until just done. I served this with cheese-and-Anaheim-pepper enchiladas. Yum!


Wednesday's Dish - Chayote with Tomato, Green Chile and Cheese

tomato/chile puree
  1. Peel 1-2 chayotes and slice into julienned strips. The core of the chayote is edible and a bit nutty so go ahead and leave it in.
  2. Roast whole tomatoes (I used more of the super cute cherry tomatoes) under the broiler until they begin to pop, then process (leave the skin on) with 1-2 roasted green chile peppers (peeled and seeded) and 2-3 garlic cloves until smooth.
  3. Dice and saute half a yellow onion, once the onion becomes translucent, add your tomato/pepper puree and a pinch of red pepper flakes.
  4. Stir in the chayote and 1/4 cup water or stock. Cook 15 minutes.
  5. Remove from heat and stir in 1-2 tbsp chopped cilantro and 1/4 cup shredded Monterrey Jack cheese.   
I didn't have any cilantro on hand, but I didn't have to go to the store because my husband is a genius. Last time we had bunches of cilantro, he froze chopped cilantro with a little water in an ice cube tray like little cilantrocicles. I just had to grab a cube and let it thaw.


I liked this dish a lot better than the previous one. Nathan and I both decided that chayote is okay. I will probably never buy a chayote in the store, but I wouldn't refuse it if served. The roasted tomato and chile sauce tasted good and cheese makes everything better. I have a coworker who often says she'd eat a shoe if it had melted cheese on it. Well, I'd eat a chayote if it had melted cheese on it.

Chayote Squash with tomato peppers and cheese served with pollo asada.

Saturday, March 5, 2011

The March 5th Haul

Saturday School has ended and I can finally go back to my normal Saturday routine. Most (childless) people would balk at the idea of willingly getting up at 7 on a Saturday morning after a full work week just to go get produce, but I love it. It feels like Christmas, "What will I get?" So, I woke up at 7 and gleefully got my big gulp, drove to Sunny Springs Park, and picked up a giant box of fresh surprises.

butter gold potatoes, turnips, green beans, spinach, tomatoes, yellow squash, acorn squash, bananas, mineola oranges, braeburn apples, mangoes, and a pineapple

So I get home from the park around 8:15, turn NPR on the radio in the living room (because Weekend Edition, Car Talk and Wait Wait Don't Tell Me are awesome), and wash all the fruits and veggies, put them away where they belong, clean my kitchen and sit down and plan what I'll cook during the week. I flip through 5 or 6 of my favorite cookbooks and browse Recipe Zaar to try and use as much as possible from my basket while buying as little as possible from the grocery store. I wonder what the people at the store must think of me every time I buy nothing but meat, butter, cheese and spices from them.

I settled on a lamb stew to use some of the turnips and potatoes as well as carrots I still have in the fridge and some aloo saag to use more potatoes and the spinach. The recipes come from these beautiful cookbooks. I also want to dust off this recipe for stuffed acorn squash. There are some amazing sites for recipes and cooking online, but I love cookbooks. I love flipping through them and seeing gorgeous professional pictures, and I love having them on my book shelf.

Saturday, February 19, 2011

Home Cooked Romance

Two drink minimum enforced.

This year, my husband and I celebrated our first Valentine's Day as a married couple. Nathan is, like every male I know, just not that into St. Valentine, but he knew that our first married February 14th would be special to me.

"Don't worry about dinner tomorrow," he told me (while we were eating at a nice little French restaurant on Sunday evening), "I've got it." I was all aflutter about my romantic husband-cooked dinner, but then he asked me if the type of potatoes we had at home would make good fries.

Romantic Candlelight Dinner
As I drove home from work (middle school on Valentine's Day is, by the way, the worst thing in the world), I wondered if I would get burgers or fish and chips. It turned out to be delicious burgers. He made me #9, The Gypsy, and he even put candles on the table. We didn't have candles. My husband went to Target after grocery shopping to buy candles to serve me a candlelit dinner. I win.

 I wanted to return the favor and make a nice dinner, so on Wednesday I chilled some wine, made some stuffed mushrooms as appetizers and created a pasta dish out of ingredients we had on hand from our bountiful basket and my currently very well stocked freezer.

Pasta seems like a romantic food when it's done right though I'm not sure why. Maybe pasta conjures up images of Italy, or maybe it's because so many first dates happen at Italian restaurants, or maybe it's because we think of Lady and the Tramp slurping a long spaghetti noodle until their lips touch whenever we eat it. Whatever the reason, something about carbs slathered in herbs and sauce feels like a meal for lovers or I guess athletes.

Our Valentine week bountiful basket included mushrooms, green onions, orange bell peppers and broccoli, and there were plenty of chicken breasts in the freezer. I also had cream cheese (for the stuffed mushrooms) and heavy cream leftover from making cream of celery soup earlier in the week. Also, Nathan had bought a wedge of Parmesan for the burgers meaning I didn't have to shop for a single thing.

Mushrooms stuffed with Italian Sausage
Stuffed mushrooms are super simple to make, but they are delicious and feel fancy. I usually use bacon for stuffed mushrooms, but the closest thing I had on hand was some spicy Italian sausage. No matter, it worked just as well. To make the filling, simply fry up your sausage or bacon. Once it's cooked, add sliced green onions and cream cheese and allow the cheese to melt. I had smallish white mushrooms which are perfect for bite-sized appetizers. Just pull out the stems and stuff the mushrooms with the cream cheese mixture, then bake them at 360 for about 10 minutes.


Real cheese makes everything better.

I presented these little morsels of love to my man while I got to making the main course. First, I sliced the chicken breasts into thin strips and seasoned with a few teaspoons of "Cajun Seasoning" from a jar. The Cajun spice along with cream sauce is a really good combination that makes the meal seem a lot more accomplished than normal chicken alfredo. I sauteed the seasoned chicken with peppers and broccoli (par boil the broccoli before sauteing so it doesn't take forever). For the sauce, I simply added about half a cup of heavy cream and some freshly grated Parmesan cheese during the last few minutes of cooking, then tossed with linguine to serve.


Voila, my version of a romantic dinner at home. I think Nathan's beats mine though. His was thoughtful; mine was "anything you can do, I can do better" proving that growing up and getting married hasn't made me any less of a brat. I am a work in progress.

Nyah Nyah


Wednesday, February 2, 2011

She's My Tomato Pie

I'm not usually a huge fan of Emeril. His recipes are nice enough, but the whole cooking in front of a cheering live audience thing kind of turns me off. Why do you need an audience, Emeril? Crap, why do I need an audience? Now I'm disturbed.

Roma Ro-Ma-Ma
My aunt Sherrie gave me this beautiful cookbook for Christmas though, and I was immediately tantalized by the recipe for "Cheesy Creole Tomato Pie." There were Roma tomatoes in my Bountiful Basket (which Nathan picked up for us since I have Saturday School for the next 5 weeks - thanks honey!), and I didn't want to make more soup or sauces.

Cheesy Tomato Pie
  •  pie crust (I used a frozen pie crust from the grocery store.  Pie crust is pretty easy to make, but meh, I didn't feel like it and my kitchen is too small for extra messes)
  • 1 egg, separated
  • 2 lbs ripe tomatoes (Creole, Beefsteak and Heirloom were all specified as acceptable by Emeril himself)
  • salt and pepper
  • 4 tbsp mayo
  • 1/3 cup bread crumbs
  • 1/4 cup thinly sliced sweet onions
  • 1 tbsp fresh thyme leaves
  • 2 tbsp chopped fresh basil leaves
  • about 1/2 cup grated fontina cheese (according to wikipedia, Gruyere, Gouda and Edam are all fine substitutes)
  • about 1/2 cup grated mozzarella cheese
  • 2 tbsp olive oil (fo drizzle)
  • 2 tbsp grated Parmesan cheese
  1. Roll out the pie dough and fit into a 9 or 10 inch deep dish pie plate.
  2. Preheat the oven to 375.
  3. Line pie shell with aluminum foil and bake for 13 minutes.
  4. Remove foil and bake 3 minutes more; let cool.
  5. Lightly beat the egg white and use a pastry brush to coat the surface of the pie shell with egg white.
  6. Slice tomatoes into 1/4 inch rounds.  Season with salt and pepper.
  7. Combine the egg yolk with the mayonnaise.
  8. Sprinkle 1/3 of the bread crumbs in the bottom of the pie shell. Layer half the sliced tomatoes to cover the bottom of the dish and top with half the onions and fresh herbs. Drizzle half the mayo mixture over the vegetables and top with half of the fontina, mozzarella, and half the remaining bread crumbs.
  9. Make a second layer with remaining tomatoes, onions, herbs, mayo, cheese and remaining breadcrumbs.
  10. Drizzle olive oil over the top and sprinkle with Parmesan cheese.
  11. Bake the pie for 50 minutes to 1 hour.  Be sure to cover the edges with foil.  Allow to cool for at least 30 minutes before slicing and serving.
Some notes:

I thought I had bread crumbs, but I did not.  What I did have was a bag of croutons and a food processor.  Voila, bread crumbs!  I think they taste better than the bread crumbs in an oatmeal can anyway.  Cheesy!


This pie is delicious. We loved it. Even though the recipe didn't specify them, Roma tomatoes were perfect for it, firm and juicy, and I picked up an 8oz wedge of fontina cheese for about $4.  This is the kind of food that makes me feel like a fancy cook.


According to research, images of meat are soothing to men so this picture of the steak Nathan and I shared with our tomato pie is for all the boys. Let it calm you.

Monday, January 24, 2011

2 Things with Butternut Squash

Huck, clearly impressed.
We got two butternut squash in our bountiful basket this week, and I'm a little souped out, so I decided to go huge and try making the most delicious of dishes: butternut squash ravioli.  I don't have any tools for rolling out pasta (besides a rolling pin), so I thought I couldn't do it on my own.  I planned on cheating and buying won-ton wrappers, but none of the grocery stores I went to had any.  The lady I asked at Trader Joe's said they didn't carry them anymore and that I should go down to any of the Asian markets on Spring Mountain.  It's something I like to do anyway, but I was so frustrated at that point that I decided to just do it myself.

 Since I've never made my own pasta before, I consulted my CIA contacts* for help.  Two young men involved with the CIA who will be known only as Boud and Pool to protect their identities explained the process.  "Flour and eggs," they told me.  "It's just flour and eggs."  They instructed me to create a basin of flour and crack eggs into it until it felt right (Pool said about four), mix it by hand, knead, and let it rest for 20 minutes.  I was instructed that the dough would be stiff, but that this was normal.

 While I fully trust my contacts, I did not trust myself to understand text-based instructions.  I am a visual learner, thankfully, I found this video on youtube.  Armed with instructions, I set out to create ravioli dough.  It turns out making pasta is messy and fun, and I love it.

The delightfully European man in the cooking video that refused embedding says to use egg yolks only or the dough will be stiff.  I chose to include the egg whites because I felt stiff dough would be easier to roll out by had without breaking.  When I get a pasta machine, because now I have to have one, I will switch to using just the yolks.

I managed to mix the flour and eggs into a firm dough and, after letting it sit for 20 minutes or so, rolled it out with a rolling pin.  I ended up with two very narrow ovals of dough which I tried filling in two different ways.  I placed spoonfuls of my butternut squash mixture along one side of the first oval and cut it into strips with a pizza cutter (fancy!)  Then I folded the strips in half with the filling in the middle sealing the edges.  This worked, but wasn't very pretty due to my imprecise dough.

I used a shot glass (fancy!) to cut the second sheet of dough into circles which were pressed together with a scoop of filling between.  These raviolis looked prettier, but wasted some dough.

The whole process was easier than I anticipated, and the raviolis tasted great but were a little thick.  Gotta get that pasta maker.

Butternut Squash Ravioli Filling
  • 1 butternut squash, halved and seeded
  • olive oil
  • butter
  • 1 large leek (white part only) halved and cut into small strips (be careful to wash between the layers of the leek; nobody likes sandy raviolis) 
  • 1/2 cup grated Parmesan cheese
  • 10-12 fresh sage leaves
  1. Preheat oven to 400, brush olive oil over the cut sides of the squash and season with salt and pepper. Place the squash cut side down in a baking dish and bake for about 40 minutes (until soft).  Scoop the cooked squash out of its skin and place in a food processor to puree.
  2. While the squash is cooking, melt 2 tbsp butter and saute the leek until browned.  Add finely chopped sage leaves and Parmesan cheese when the leek is nearly done.
  3. Add the leek mixture to the butternut squash in the food processor and puree until smooth.
  4. Stuff ravioli dough or won-ton wrappers with the butternut squash mixture and boil 3-4 minutes (until they float to the top)


Tonight's adventure in squash is less ambitious, but equally delicious.  I made a gratin of  butternut squash (skinned, seeded, and sliced with a small mandolin - microwave the squash for about 3 minutes to make slicing easier) to be served with simple pork chops. 

Butternut Squash and Spinach Gratin
  1. Skin, seed and slice a butternut squash.
  2. Blanch, drain and chop 1 bunch spinach (or use about 1 cup frozen chopped spinach).
  3. Saute half a cup of diced onion and two cloves of garlic in 2 tbsp butter. 
  4. Add onion and garlic to spinach along with 1/4 tsp nutmeg, salt and pepper, and 1/2 c cream.
  5. Layer sliced squash, spinach mixture, and grated Parmesan cheese in a buttered casserole and bake at 400 for about half an hour or until browned and bubbling. 
*Culinary Institute of America  

Wednesday, January 19, 2011

Something Spicy

Pretty much every week, my bountiful basket offers me something that makes me pause and wonder, "What do I do with this?"  This week, that something was 6 Anaheim peppers.  I thought for a minute of gourmet burgers with roasted peppers and of home made green chili sauce, but decided to go for the obvious and make chile rellenos.  Too bad I've never made chile rellenos before.

I teach at a school with a heavily Hispanic/Latino population, and I've had chile rellenos made by my students and their families.  They are, basically, the greatest thing imaginable: roasted peppers stuffed with gooey melted cheese and fried to a golden crisp.  I felt a strange pressure to get this right.  When I told Nathan that I was going to try it, he got really excited which just added to the pressure.  "I must be a good cook.  I must be a good cook."


Step one is to roast the peppers.  Just put them on a baking sheet and pop them in the oven at 450.  Turn them once in a while until the skin is dark brown and blistery all over.  I was afraid of burning them (silly me) and did not let them get nearly brown enough.  Ah well, next time.

Once the peppers are blackened, put them in a paper bag and fold the top down to seal them in.  This allows the peppers to steam as they cool and is supposed to make them easier to peel.  I have a feeling cooking them more would have also made them easier to peel, so do better than I did and really roast those peppers.  I couldn't find a paper bag around anywhere, so I just put them in a bowl and stuck a plate on top.  Same thing.   Ashley, if you are reading this, you left some of your plates at the house on Ravenna.

split pepper, still good!
After the chili's have cooled enough to handle, peel the blackened skin off so you are left with slimy, but intact green peppers.  Cut a slit near the top of each pepper and slide in slices of monterey jack cheese.  Try to do this without splitting the peppers if you can.  I split one pretty badly, but held it together with toothpicks while I breaded it.  I pulled the toothpicks out before frying and it stayed together pretty well.

Once your peppers are skinned and stuffed, dredge them in some flower and prepare the egg wash.  In order to get a crust that was both substantial and airy, I separated 3 eggs and beat the whites until they were stiff, then folded the yolks back in.  Julia Child (I just noticed her initials - hee) would tell you to whisk the egg whites until they form the ribbon, but I still am not sure what that means.  It takes a while to get those egg whites nice and stiff, so this step is a good place to prepare your frying oil.  I am lucky enough to have married a man who owned a deep fryer, so preparing my frying oil involves having my husband get the fryer off the top of the fridge and set the temperature.  If you are not as lucky as I am, use a cast iron or heavy skillet and heat some peanut oil until flour browns when you sprinkle it in.

Dip your skinned, flour dredged, cheese filled chilis in your whipped eggs and immediately place them in frying oil.  Leave them for about 3 minutes or until golden brown.  Eat them while they're still hot.

mmm diet coke


The chilis I made weren't the best I've ever had, but they weren't the worst either, so I am considering this one a win.  I served them with some enchilada sauce and carne asada.  Don't ask me for an asada recipe - I bought it from the butcher's counter at my grocery store.  You can have an enchilada sauce recipe though, made with all fresh ingredients.

All Purpose Red Sauce for Mexican Foods
  • combine 2-4 peeled, quartered tomatoes, 1 onion roughly chopped, and 2 cloves of garlic in a food processor and pulse until liquefied.
  • heat 1 tbsp olive oil in a sauce pan and add the tomato mixture, simmer for 10 minutes
  • add 1/2 cup chicken broth, 3 diced jalapenos (or other small chilis), a dash of cinnamon and salt to taste and continue to simmer until ready to serve 

Saturday, January 15, 2011

Science Rules!

I am just gonna come out and say it. I love pickles. I love them in sandwiches; I love them on burgers; I love them all by themselves. Whenever I get cucumbers in my bountiful basket, I make refrigerator pickles, but today, while searching for a snack, I noticed something curious.


The garlic in my homemade pickles has turned blue! I was frightened, so I turned to google.  Here's what I learned:

Raw garlic contains an enzyme that, if not cooked out, reacts with sulfur in the garlic and any copper in the water or pot to form copper sulfate.  Copper sulfate is blue and totally safe to eat.

Refrigerator Pickles  

  • cucumbers sliced or in spears
  • 2-3 cloves garlic per jar
  • 1 head dill
  • 2 quarts water
  • 1 cup vinegar
  • 1/3 cup salt
  • 1/4 cup sugar
  1. place garlic cloves and a few sprigs of dill in the bottom of each jar (I didn't have any fresh dill this time so I used a half teaspoon of dried dill)
  2. boil water, vinegar, salt and sugar, stir and let cool
  3. pack the jars with cucumbers and cover with cooled brine
The pickles are ready to eat in 3 days and will last about 3 weeks, if you don't eat them all first.

Full Stop

This morning I learned something that rocked my world: I have been typing incorrectly my entire life. I read in this article that even though my keyboarding teacher in elementary school told me to, it is incorrect to use two spaces after a period. I am practicing using full stops and the space bar correctly now, but it's going to take me some time to get used to this strange new world.

Anyhow, today is Saturday which means it's Bountiful Baskets day. If you're reading my first blog post, you most likely know me so you have no doubt heard me go on (and on and on) about how amazing Bonutiful Baskets Food Co-op is. Just in case you've missed the good word, BBFC is a co-op operating out of Arizona with sites in several western states including Utah, Nevada, Wyoming, Idaho, Oregon and Washington. Each week, contributors log in at the website and pre-pay $15 for a half fruit, half veggie produce basket. There are also addons available every week like 9 grain bread, tortillas, honey, and 24-36lb boxes of whatever's in season. You can also sign up to get a guaranteed organic basket each week, but I don't. It's smaller, more expensive, and the regular baskets often include organic produce anyway.

Saturdays are now my favorite day of the week. I am the kind of person that finds a lot of comfort in routine, so the weekly trek to Sunny Springs Park to pick up my produce followed by unpacking, cleaning, menu planning and cooking is soothing. It restores my sanity. I am a barefoot zen master making refrigerator pickles each week. The sangria I usually make with whatever fruits I have leftover from the previous week helps too.

This week, the baskets had lettuce, spinach, asparagus, butternut squash, Anaheim peppers, cherry tomatoes, tangelos, apples, Asian pears, regular pears, kiwis, and a pineapple. I bought everything to make chili rellenos, and if I can find some pre-made ravioli or won-ton wrappers, I'll try my hand at butternut squash raviolis as well. Today, though, I am going to make stuffed shells because I still have tomatoes left from last week's basket that need to be used.

Since I guess this is mostly going to be a cooking blog, I should share my favorite recipe for marinara sauce. I try to use nothing from a can or a packet if I want something to taste really good, and this recipe only uses a few tablespoons of canned tomato paste for color since whenever I try to make sauce with fresh tomatoes it turns out sort of pinkish and not the robust, appetizing red one expects.


May Not Be Actual Marina Sauce Better Just Call It Tomato
  • Extra Virgin Olive Oil
  • 1 mediumish yellow onion
  • 4+ garlic cloves (I use at least 6. No matter what the liberal Forks media tells us, vampires are scary, not sexy, and garlic is your first and best line of defense.)
  • a palm full of fresh chopped basil or 1tbsp dried.
  • a smaller palm full of fresh chopped oregano or 2 tsp dried
  • 1/2-1 tsp crushed red pepper flakes (I like it spicy)
  • 1 6oz can tomato paste (though I use a few spoonfuls, not the whole can)
  • 4-6 tomatoes or 1 28oz can whole tomatoes
  • 1/2 cup dry red wine
  • 2 tsp sugar
  • 1 tsp (or more) salt
  1. Saute diced onion and garlic in olive oil until soft, add herbs, red pepper flakes, and tomato paste.
  2. Stir in tomatoes (to prepare fresh tomatoes, I just core them and run them through a few pulses in my food processor), wine, sugar and salt
  3. simmer as long as humanly possible
Today along with the garlic and onion, I diced up and added some mushrooms and yellow squash I had, but then I found the sauce a little too chunky, so I hit it with my stick blender until it was smoother. While it simmers, I am going to go back through this post and make sure I only used one space after each full stop.